Just follow the following steps and you will be able to login in gmail and orkut with multiple accounts. Through this you will be able to make profiles in your firefox.
Step 1:
Open system properties(by right clicking my computer), choose tab advanced, click to environment variables button. in system variables section, click new. type this information to each textbox.
Step 2:
variable name: moz_no_remote (should be all small letter).
variable value: 1
Step 3:
open firefox icon's properties(from desktop and quick launch). add extension -p to command line(like "c:\program files\mozilla firefox\firefox.exe" -p). press ok.
When you will open firefox it will prompt for profile selection create a profile,open firefox login to orkut open once more use another profile login
Tuesday, March 18, 2008
Sunday, February 24, 2008
How to Change Windows Time Display to Include Your Name
- Navigate to START → Settings → Control Panel.
- Double click on Regional and Language Options, if you are in Classic View. Otherwise, click on Date, Time, Language, and Regional Options, then click on Regional Options. You should see the following window:

- Click on the Customize.
- Click on the Time tab. You should see:

- Replace the AM and PM with your first name.
- Click on Apply.
- Click on OK.
- Close the Regional and Language Options window.


Sunday, February 17, 2008
A R Rahman's concert in Chennai
I managed to take videos of the A R Rahman concert in Chennai on February 9th on my mobile phone.The concert was held at YMCA grounds.The concert was awesome,except for the sound engineering.Chitra,Hariharan,Blaaze,Chinmayee,Neeti,Ujjaini,Benny,Naresh Iyer,Mohamed Aslam took part.
Here are the videos:
For Rahman's entry,Khalbali,Kannalane,Jaage Hein,Humma Humma,go to:
www.maverickshaunt.blogspot.com
Athiradee:
The Boss:
Unplugged:
Vennilave and Mayya Mayya:
Here are the videos:
For Rahman's entry,Khalbali,Kannalane,Jaage Hein,Humma Humma,go to:
www.maverickshaunt.blogspot.com
Athiradee:
The Boss:
Unplugged:
Vennilave and Mayya Mayya:
Monday, December 24, 2007
Video Avatars
Ever wonder how people make Avatars out of Video? Here's how.
Video Avatars
1. Open PowerDVD:
2. Open a movie or Video clip:
3. Go to the beginning of the part u want as avatar & click on pause
4. Make a picture of it:
5. Press 2 steps forward & then make another pic, do this until u got the whole part:
6. Go to imageready 7 & then select "file", "import" & then "folder as frames..." & then u select the folder wit your pics made wit powerDVD:
Sunday, December 23, 2007
Remove Funny UST Scandal.avi.exe
Details:
1) This will block your Task Manager, Registry Editor and Command Prompt.
2) It hacks in your Yahoo Messenger and sends stupid and senseless messages to them and even a copy of itself.3) It will log your all key strokes and send them to an unknown email address through IM.
4) It slows down your system badly and reinstalling the OS will do no good.
5) It will disable the search and viewing of hidden files.
It’s built using AutoIt V3 virus programming software.--(source= some blog)
Windows XP:
This virus was made mainly to infect XP and Windows NT systems. In XP and NT systems, it makes the following files:
a) Killer.exe (4084 kb) in c:\windows\
b) lsass.exe (3920kb) in c:\documents and settings\all users\start menu\programs\startup
c) xmss.exe (4088kb) in all partitioned drives and in c:\windows
d) autorun.inf (1kb) in all partitioned drives with a script.
e) Funny UST Scandal.avi.exe in all partitions and Funny UST Scandal.exe in c:\Windows.
This Virus makes the following registry entries:
a) HKLM\Software\Microsoft\WindowNT\CurrentVersion\Wi nlogon
shell(killer.exe or xmss.exe)
b) HKCU\Software\Microsoft\windows\Currentversion\Run
Runonce(c:\windows\xmss.exe)
If the virus has completely installed itself, then you can find all these files in your system.
To remove this virus:
a) In order to removes the files, you’ll first have to stop the execution of this virus. To do so, download this file and run it.
b) Now open cmd.exe and go the above mentioned locations and unhide the files by typing: attrib –h –s Funny UST Scandal.exe for C:\windows and so on for all the other files in different locations. You might get an error while unhiding Funny UST Scandal.avi.exe which is placed in all partitions. If you get that error, just leave that file.
c) After unhiding all these files, delete them from your hard disk.
d) Download REPLACER and open it.
e) In the REPLACER type: c:\Funny UST Scandal.avi.exe and press enter. It will now ask you for another file. Create a text file named a.txt in C:\ and then type: c:\ a.txt and press enter. Press Y and press enter. Go to C: drive and there you’ll find 3 files named Funny UST Scandal.backup, Funny UST Scandal.exe and a Temp file. Delete them.
f) Repeat Step e) for all you partitions.
Windows Vista:
Files included:
a) xmss.exe (4088kb) in all partitioned drives and in c:\windows
b) autorun.inf (1kb) in all partitioned drives with a script.
c) Funny UST Scandal.avi.exe in all partitions and Funny UST Scandal.exe in c:\Windows.
Registry Entries:
a) HKLM\Software\Microsoft\WindowNT\CurrentVersion\Wi nlogon
shell(killer.exe or xmss.exe)
b) HKCU\Software\Microsoft\windows\Currentversion\Run
Runonce(c:\windows\xmss.exe)
The second key might no be present.
Removing the Virus:
To remove this virus:
a) In order to removes the files, you’ll first have to stop the execution of this virus. To do so, download this file and run it.
b) Now open cmd.exe and go the above mentioned locations and unhide the files by typing: attrib –h –s Funny UST Scandal.exe for C:\windows and so on for all the other files in different locations. You might get an error while unhiding Funny UST Scandal.avi.exe which is placed in all partitions. If you get that error, just leave that file.
c) After unhiding all these files, delete them from your hard disk.
d) Download REPLACER and open it.
e) In the REPLACER type: c:\Funny UST Scandal.avi.exe and press enter. It will now ask you for another file. Create a text file named a.txt in C:\ and then type: c:\ a.txt and press enter. Press Y and press enter. Go to C: drive and there you’ll find 3 files named Funny UST Scandal.backup, Funny UST Scandal.exe and a Temp file. Delete them.
f) Repeat Step e) for all you partitions.
Hide Files in Jpeg images
We will hide a text file called "code.txt" in an image called "nirvana.jpg".You need to have Winrar for this.So here goes....
1)Move both code.txt and nirvana.jpg to a new folder(say C:\New)
2)Add code.txt to a new rar archive called code.rar in the same folder,(C:\New in our example).
3)Now go to Start -> Run..., type cmd and press Enter.
4)Go to the folder where your files are located,(C:\New in our example).by using cd.. command.(use cd.. command to go one level up).

5)Now type "copy /b nirvana.jpg + code.rar secret.jpg"(without quotes) where secret.jpg is the file name u want to give to image that contains both nirvana.jpg and code.txt.
Congrats!!You are almost done with it now .
.
6)If you open secret.jpg,you will see the original image(nirvana.jpg).Open secret.jpg with Winrar and you will see your hidden file(code.txt)
1)Move both code.txt and nirvana.jpg to a new folder(say C:\New)
2)Add code.txt to a new rar archive called code.rar in the same folder,(C:\New in our example).
3)Now go to Start -> Run..., type cmd and press Enter.
4)Go to the folder where your files are located,(C:\New in our example).by using cd.. command.(use cd.. command to go one level up).
5)Now type "copy /b nirvana.jpg + code.rar secret.jpg"(without quotes) where secret.jpg is the file name u want to give to image that contains both nirvana.jpg and code.txt.
Congrats!!You are almost done with it now
6)If you open secret.jpg,you will see the original image(nirvana.jpg).Open secret.jpg with Winrar and you will see your hidden file(code.txt)
Unite Windows and Linux With a Single Mouse Click!
Step 1: Install necessary software:
· VirtualBox
Here's how to install VirtualBox on Ubuntu OS:
1. Click the above link and download VirtualBox for your architecture (i386 or amd64). Please notice that on the download page for VirtualBox, you will find packages for many other Linux distributions, in case you don't use Ubuntu.
2. Good, now that the download is finished, double click the .deb file and install the software.
3. You must execute the following command in a terminal window, in order to use VirtualBox:
sudo adduser yourusername vboxusers
4. Log out of your current session and the log back in.
That's it!
Step 2: Prepare VirtualBox to run Windows
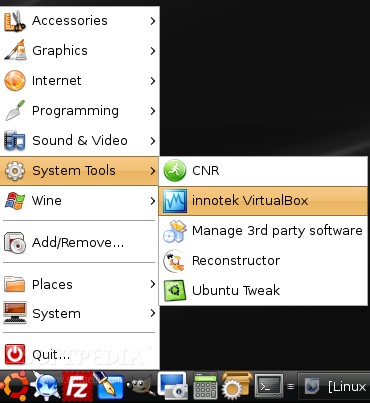
The VirtualBox application will be installed in the System Tools category, so open it from Applications -> System Tools -> Innotek VirtualBox if you are a GNOME user, or from KMenu -> System -> More applications -> Innotek VirtualBox if you are a KDE user.
Create the virtual machine
Now, you need to:
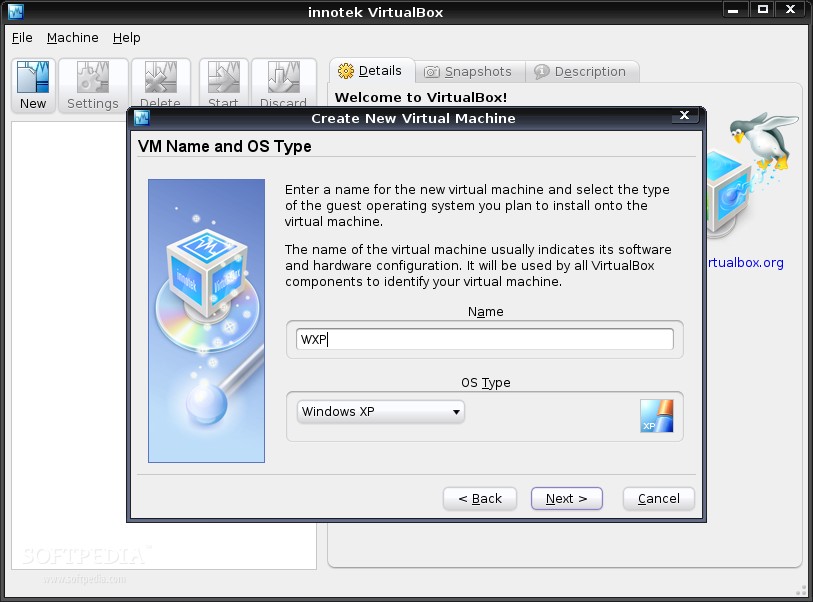
1. Click the "New" button to create a new virtual machine.
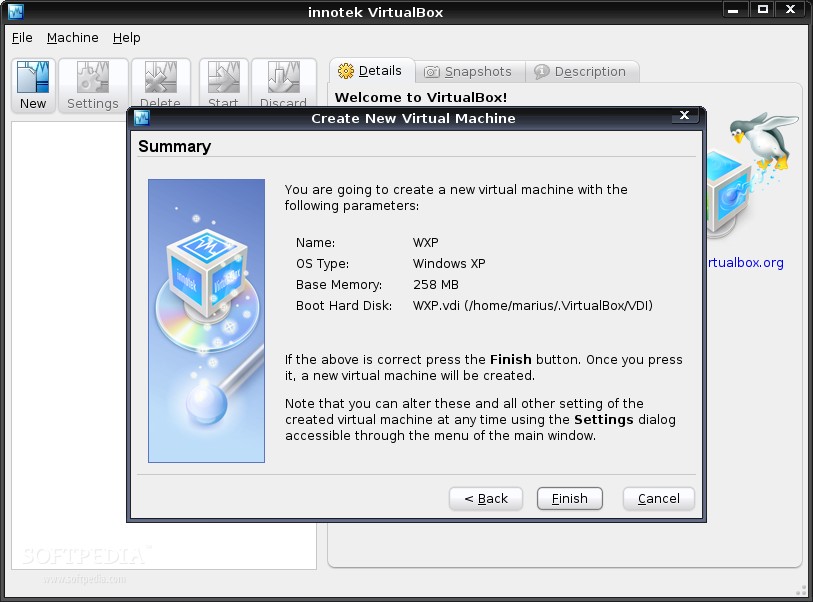
2. Select "Windows XP" as the OS Type and write a name for your virtual machine.
3. Click Next and drag the memory slider to 256 MB. If you have more than 1GB RAM, you can rise the slider to 512 MB.
4. Click Next and hit the 'New' button to create a new hard drive:
4a. Click Next
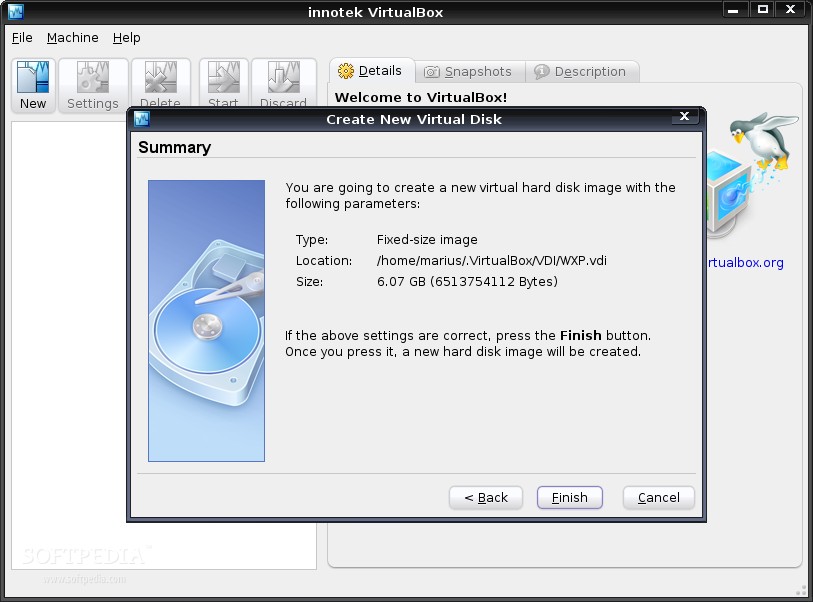
4b. Select the 'Fixed-size image' option and click Next
4c. Decrease the initial value to 6 GB by dragging the slider in this screen. If you have a bigger hard drive (250 GB or 500 GB) then you can leave the slider to 10 GB (default option). Click Next.
4d. Click Finish.
5. You can see now the newly created hard drive. Just click Next and then Finish.
The virtual machine is now created and all you have to do is to make some basic settings to it before you start installing Windows.
Configure the virtual machine
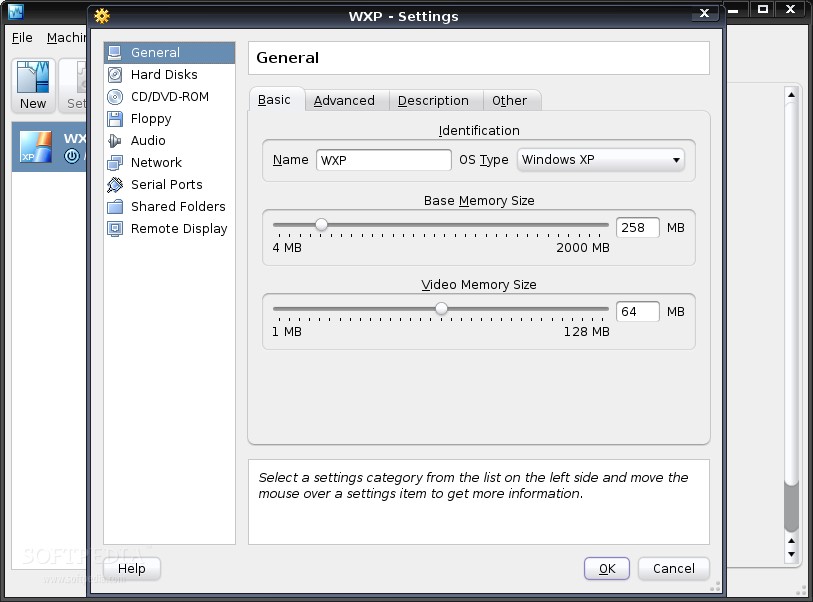
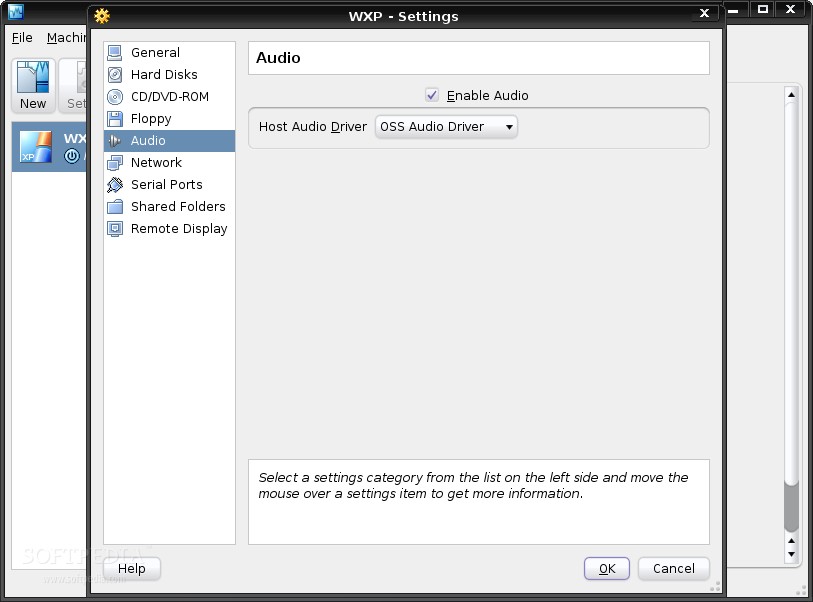
Hit the General link and be sure that you setup the virtual machine exactly like I did:
1. On the 'General' section drag the "Video Memory Size" slider to 64.
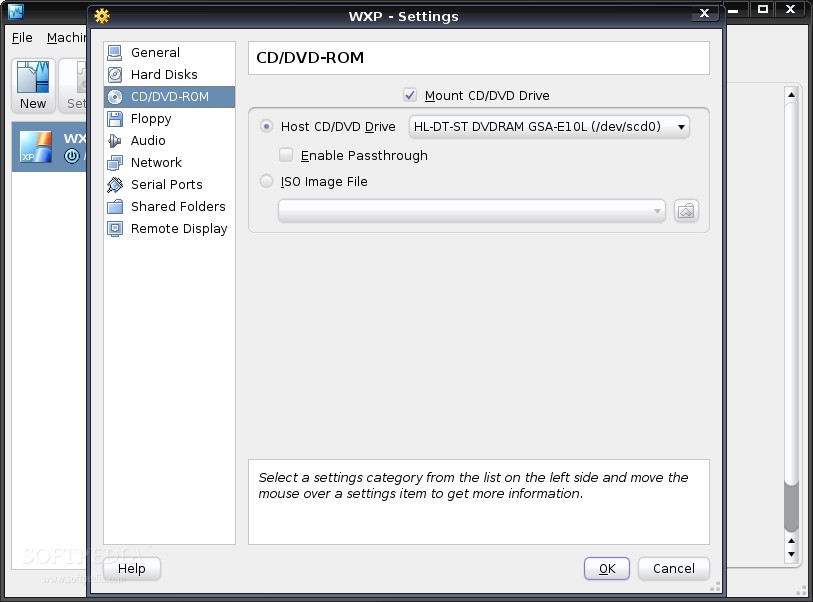
2. On the 'CD/DVD-ROM' section check the "Mount CD/DVD Drive".
3. On the 'Audio' section check the "Enable Audio" box and then select 'OSS Audio Driver' from the drop-down box.
4. On the 'Remote Display' section check the "Enable VRDP Server" box.
That's all! Now insert the Windows XP CD in your optical drive and power on the virtual machine. The CD will be detected and the Windows installation will start. I guess I don't have to explain you how to install Windows.
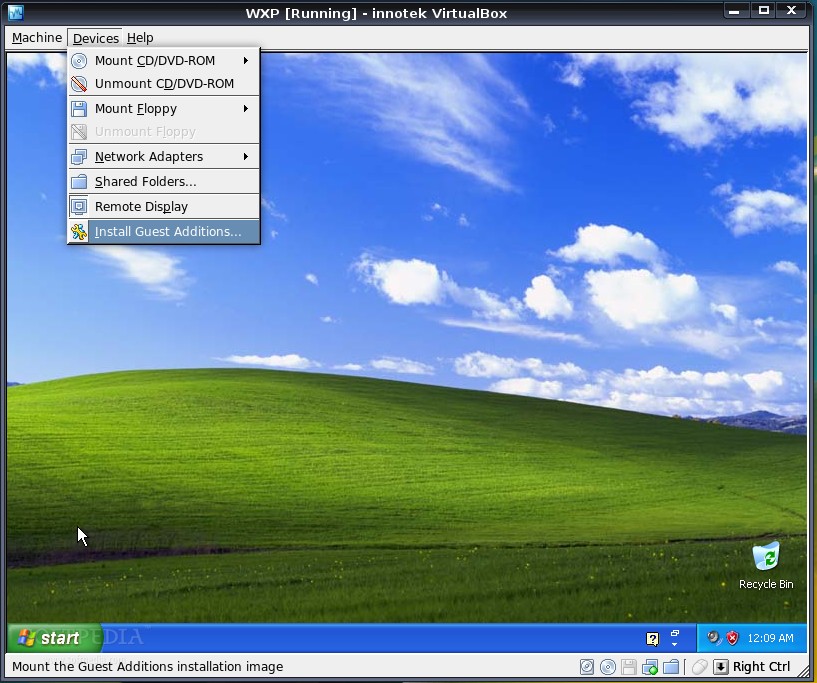
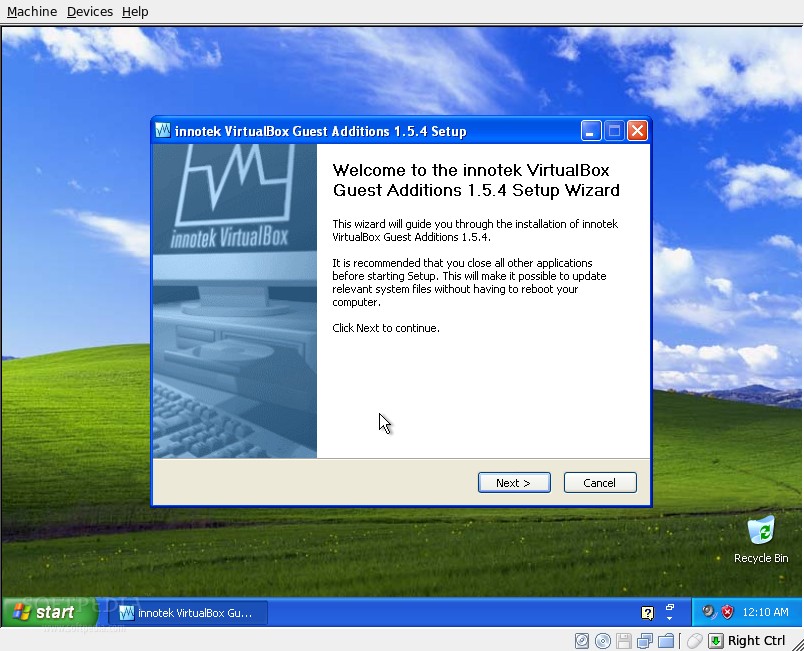
Step 3: Configure the virtual Windows
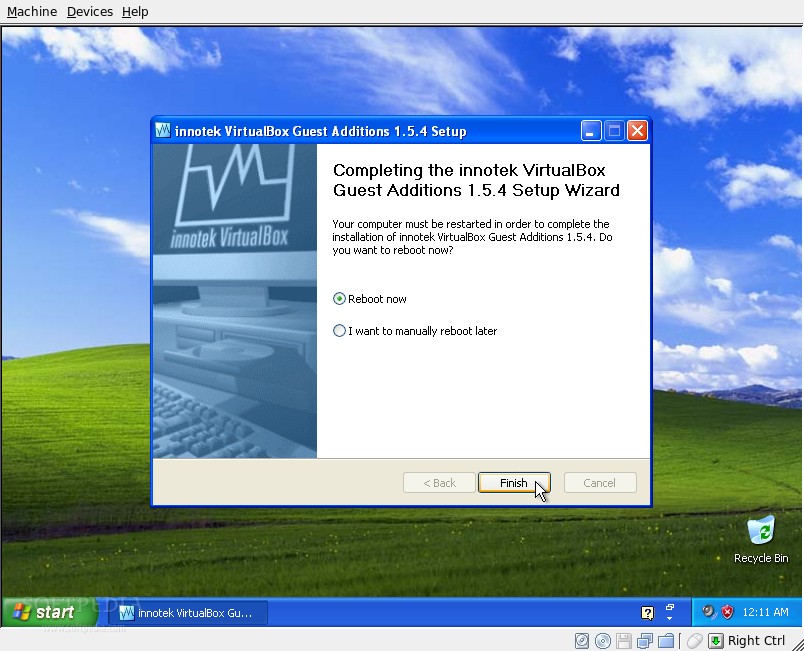
When the Windows installation is finished and you are able to see the desktop, go to Devices -> Install Guest Additions (in the VirtualBox window) and wait for an installer window to appear on your desktop. Follow the installation steps and reboot the virtual machine.
Warning: You must have a working Internet connection before you install these Guest Additions!
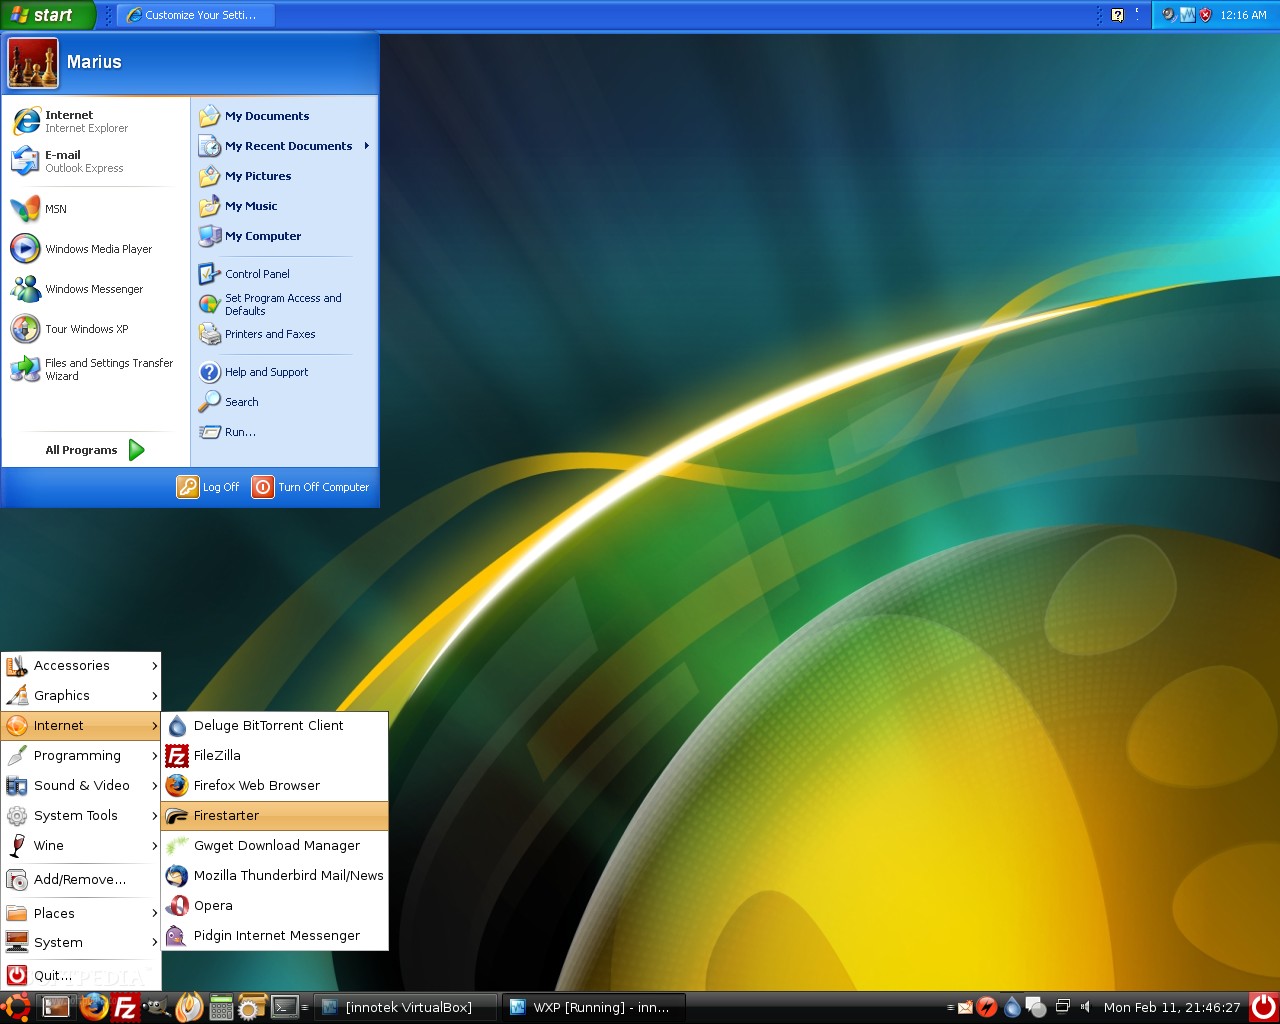
Unite Windows and Ubuntu into a single desktop
This is the final step and the moment everyone has been waiting for! All you have to do now is to deactivate your desktop effects (if you have) and go to Machine - Seamless Mode (in the VirtualBox window) and unite Windows with Ubuntu (or any distro you may have) into a single desktop.
Tip: The Windows taskbar will appear over your Linux one. Therefore, you must right click on it and unlock it, so you can move it to the upper part of the desktop.
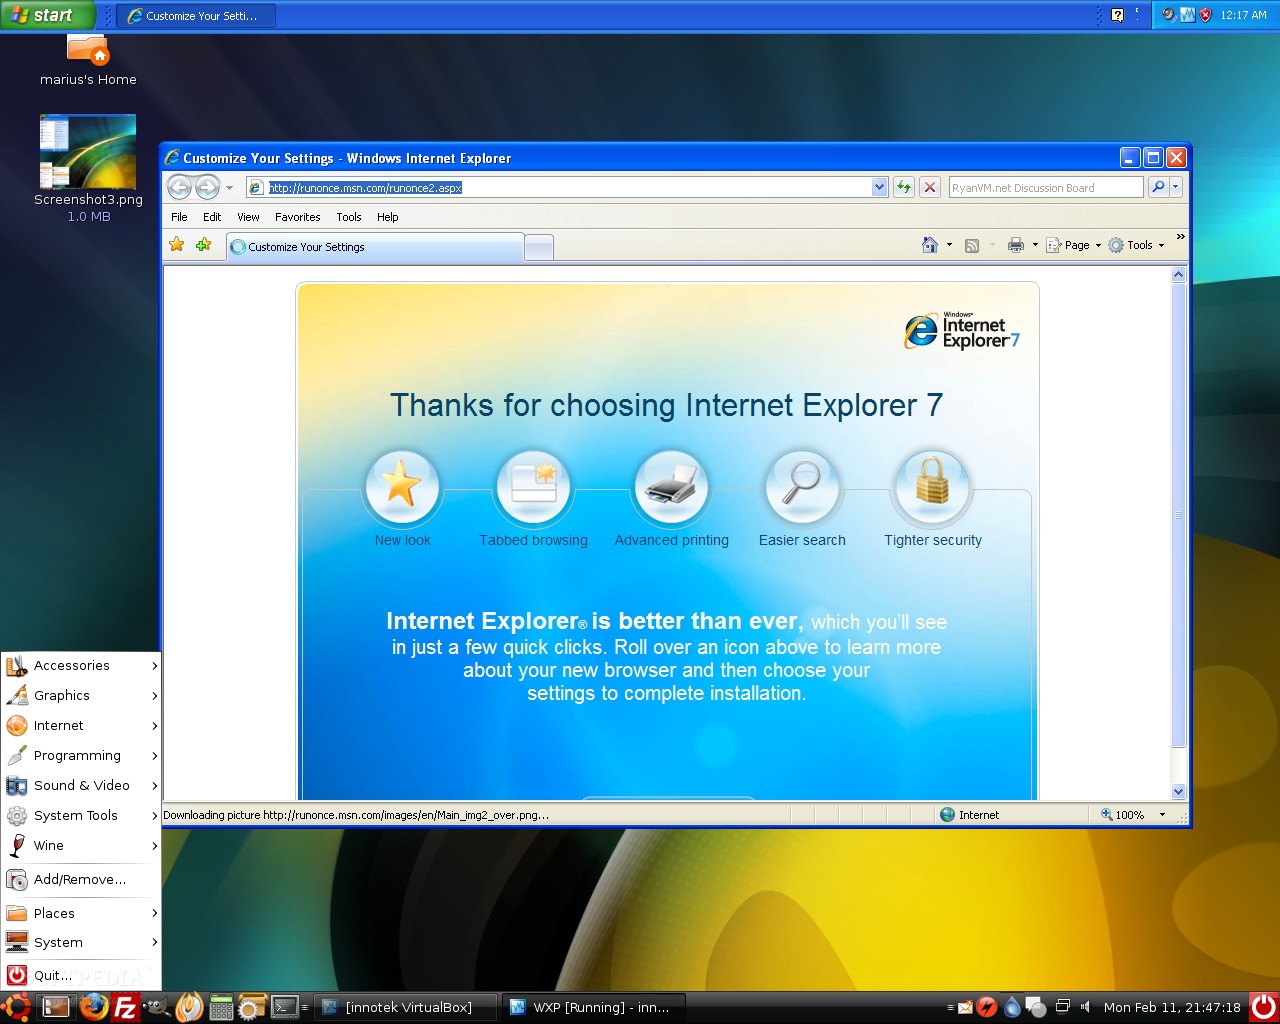
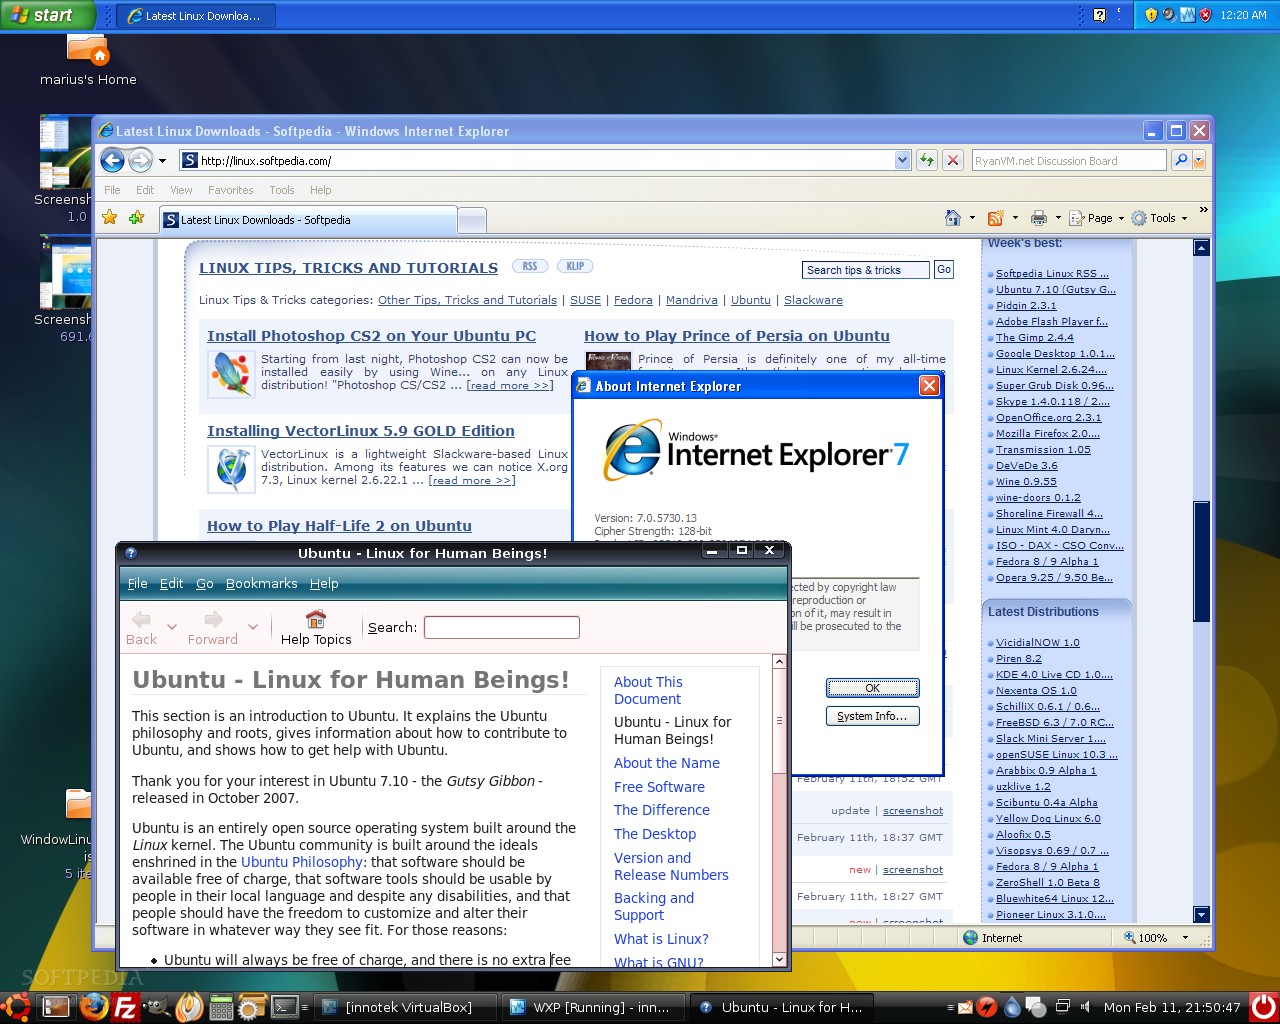
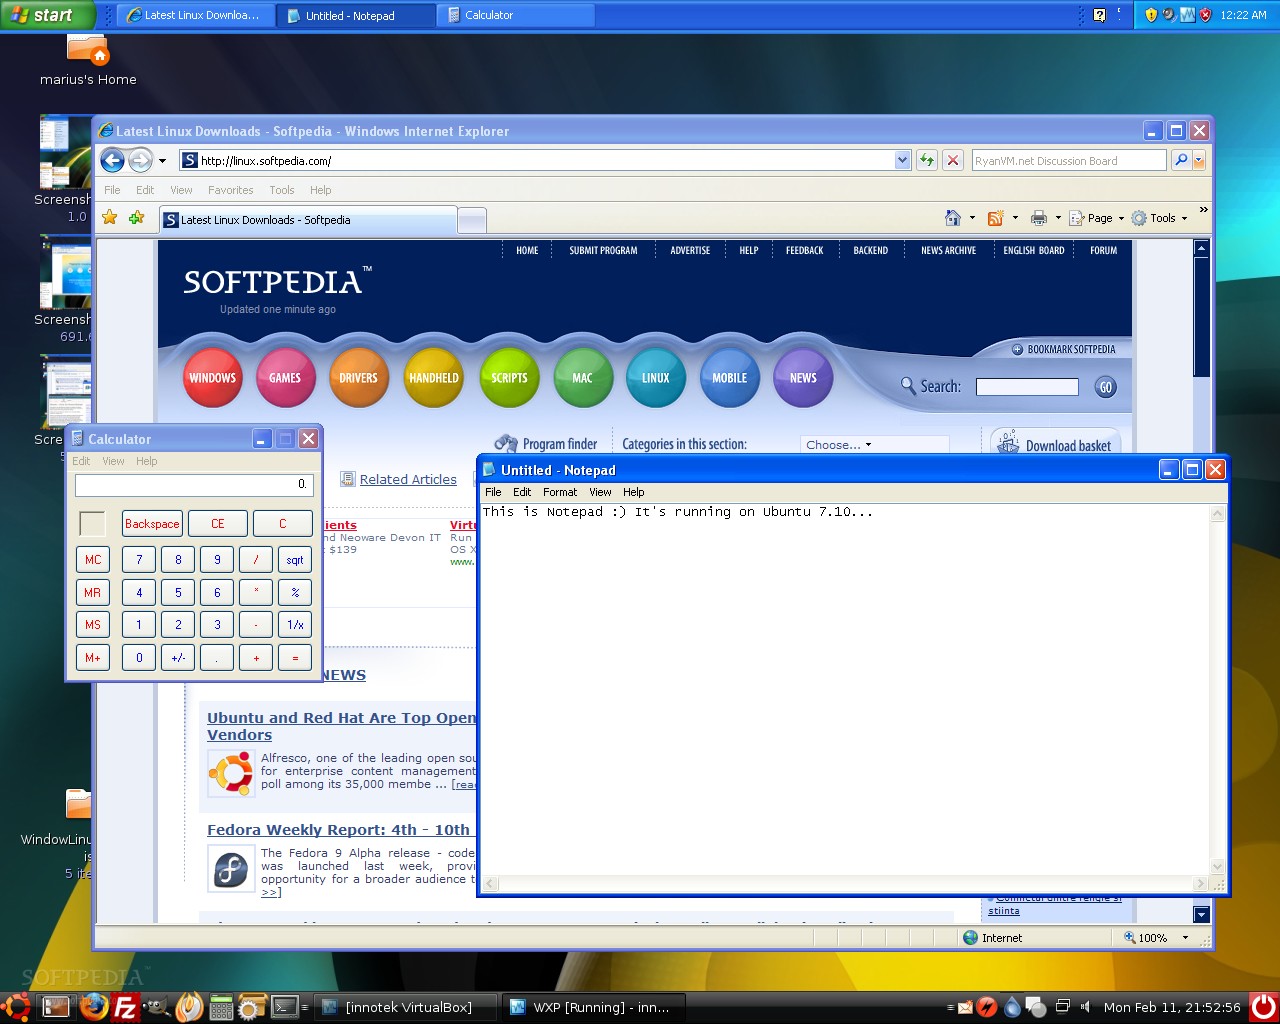
Below you can see some nice screenshots of my Windows/Ubuntu desktop, where I run Internet Explorer 7, Notepad, and any other Windows application that I found useful. Enjoy!
IMPORTANT: Remember that every time you restart your computer, the virtual machine that runs in background will close, so you'll have to open VirtualBox when you enter your Linux session and start the Windows virtual machine. The best part is that it will open automatically in seamless mode!
· VirtualBox
Here's how to install VirtualBox on Ubuntu OS:
1. Click the above link and download VirtualBox for your architecture (i386 or amd64). Please notice that on the download page for VirtualBox, you will find packages for many other Linux distributions, in case you don't use Ubuntu.
2. Good, now that the download is finished, double click the .deb file and install the software.
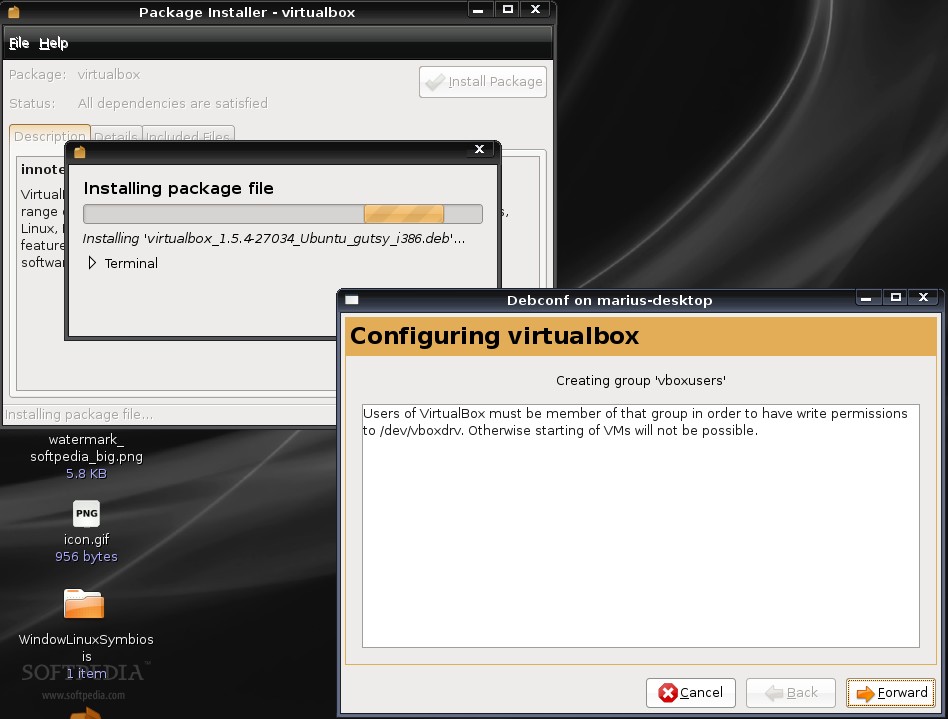 |
3. You must execute the following command in a terminal window, in order to use VirtualBox:
sudo adduser yourusername vboxusers
4. Log out of your current session and the log back in.
That's it!
Step 2: Prepare VirtualBox to run Windows
The VirtualBox application will be installed in the System Tools category, so open it from Applications -> System Tools -> Innotek VirtualBox if you are a GNOME user, or from KMenu -> System -> More applications -> Innotek VirtualBox if you are a KDE user.
 |
Create the virtual machine
Now, you need to:
 |  |  |
 |  |  |
 |  |
1. Click the "New" button to create a new virtual machine.
2. Select "Windows XP" as the OS Type and write a name for your virtual machine.
3. Click Next and drag the memory slider to 256 MB. If you have more than 1GB RAM, you can rise the slider to 512 MB.
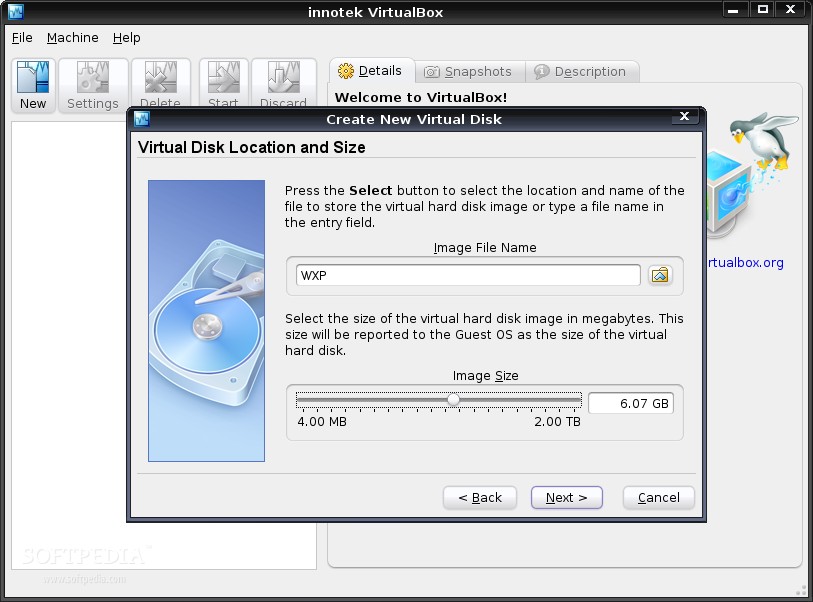
4. Click Next and hit the 'New' button to create a new hard drive:
4a. Click Next
4b. Select the 'Fixed-size image' option and click Next
4c. Decrease the initial value to 6 GB by dragging the slider in this screen. If you have a bigger hard drive (250 GB or 500 GB) then you can leave the slider to 10 GB (default option). Click Next.
4d. Click Finish.
5. You can see now the newly created hard drive. Just click Next and then Finish.
The virtual machine is now created and all you have to do is to make some basic settings to it before you start installing Windows.
Configure the virtual machine
Hit the General link and be sure that you setup the virtual machine exactly like I did:
 |  |  |
1. On the 'General' section drag the "Video Memory Size" slider to 64.
2. On the 'CD/DVD-ROM' section check the "Mount CD/DVD Drive".
3. On the 'Audio' section check the "Enable Audio" box and then select 'OSS Audio Driver' from the drop-down box.
4. On the 'Remote Display' section check the "Enable VRDP Server" box.
That's all! Now insert the Windows XP CD in your optical drive and power on the virtual machine. The CD will be detected and the Windows installation will start. I guess I don't have to explain you how to install Windows.
Step 3: Configure the virtual Windows
When the Windows installation is finished and you are able to see the desktop, go to Devices -> Install Guest Additions (in the VirtualBox window) and wait for an installer window to appear on your desktop. Follow the installation steps and reboot the virtual machine.
 |  |  |
Warning: You must have a working Internet connection before you install these Guest Additions!
Unite Windows and Ubuntu into a single desktop
This is the final step and the moment everyone has been waiting for! All you have to do now is to deactivate your desktop effects (if you have) and go to Machine - Seamless Mode (in the VirtualBox window) and unite Windows with Ubuntu (or any distro you may have) into a single desktop.
 |  |
Tip: The Windows taskbar will appear over your Linux one. Therefore, you must right click on it and unlock it, so you can move it to the upper part of the desktop.
Below you can see some nice screenshots of my Windows/Ubuntu desktop, where I run Internet Explorer 7, Notepad, and any other Windows application that I found useful. Enjoy!
 |
 |
 |
 |
IMPORTANT: Remember that every time you restart your computer, the virtual machine that runs in background will close, so you'll have to open VirtualBox when you enter your Linux session and start the Windows virtual machine. The best part is that it will open automatically in seamless mode!
Subscribe to:
Posts (Atom)
